Socket.IO, React and Node.js: Going Real-Time
 Table of Contents
Everybody builds chat apps with Socket.IO these days, yet messaging applications are only the tip of the iceberg. Think a moment about it: there are a million of other things you can build within the real-time domain.
In the following post we will start with some basic concepts all the way through exploring what Socket.IO and React can do for us when paired together.
By the end of the article you will build a simple proof of concept.
That will be quite a long post! Grab a cup of tea and take a seat before getting started!
What you will learn
- what a WebSocket is
- how to Use Socket.IO and Node.js alongside with React
Requirements
To follow along with this tutorial you should have a basic understanding of JavaScript, Node.js, and ExpressJS. Also, make sure to get the latest version of Node.js.
The WebSocket protocol, Node.js and Socket.IO
WebSocket is an internet communication protocol with a relevant interesting feature: it provides a full-duplex channel over a single TCP connection.
With WebSockets, a client and a server are able to talk to each other in real time, like they're involved in a telephone call: once connected, the client is able to receive data from the server, without any need to continuously refresh the web page. On the other hand the server will also be able to receive data in real time from the client inside the same connection.
Also, WebSockets is event-driven: both the server, and the client can react to events and messages. We can listen for a connection event, fire up a function when a new user connects to the server, emit a message (basically an event) over a socket, and much more.
WebSockets opened up an entire world of opportunities for web developers. If you're wondering how to implement this fantastic technology into your Node.js applications, well, the answer is Socket.IO, one of the most popular real-time engines for Node.js.
One thing to keep in mind is that Socket.IO is not an WebSocket implementation. The authors state that "Socket.IO indeed uses WebSocket as a transport when possible, but a WebSocket client will not be able to connect to a Socket.IO server, and a Socket.IO client will not be able to connect to a WebSocket server".
With this basic understanding of the Websocket protocol it's time to get our hands dirty.
Socket.IO, React and Node.js: preparing the project
To start off create an empty directory and move into it:
mkdir socket-io-server && cd $_Then initialize the project:
npm init -yWe also need to install Socket.io, which is the main dependency of our project, and ExpressJS. Express will help us to build the server:
npm i express socket.ioSocket.IO, React and Node.js: hands-on
So, the idea behind our little project is simple: Caty wants a real-time clock in a web page. A contrived example on purpose, feel free to adapt it to your use case!
To do that you might use setInterval in the browser, in our project instead we'll generate the timestamp on the backend, while Socket.IO will emit a message every second.
The client will pick this message over a real-time socket.
To start off create a file named app.js inside your project's directory. This will hold the actual server:
const express = require("express");
const http = require("http");
const socketIo = require("socket.io");

const port = process.env.PORT || 4001;
const index = require("./routes/index");

const app = express();
app.use(index);

const server = http.createServer(app);

const io = socketIo(server); // < Interesting!

const getApiAndEmit = "TODO";
If you worked before with Node.js, the code above should be no mystery to you. You can notice the call to socketIo() to initialize a new instance by passing in the server object.
The application calls also the index route: even if the server won't serve any HTML content we will need a very simple route to listen for any incoming connection.
Create a file named index.js inside a routes directory:
const express = require("express");
const router = express.Router();

router.get("/", (req, res) => {
  res.send({ response: "I am alive" }).status(200);
});

module.exports = router;Socket.IO, React and Node.js: designing the server
The first and most important method you'll see while working with Socket.IO is on(). It takes two arguments: the name of the event, in this case "connection", and a callback which will be executed after every connection event.
The connection event returns a socket object which will be passed to the callback function. By using said socket you will be able to send data back to a client in real time.
If you remember, Caty wants to know the current time: we can use setInterval inside the callback, and inside setInterval we can use another arrow function to call getApiAndEmit.
We must also pay attention to clearing the interval on any new connection, and on disconnection to avoid flooding the server. Here's the idea:
let interval;

io.on("connection", (socket) => {
  console.log("New client connected");
  if (interval) {
    clearInterval(interval);
  }
  interval = setInterval(() => getApiAndEmit(socket), 1000);
  socket.on("disconnect", () => {
    console.log("Client disconnected");
    clearInterval(interval);
  });
});Socket.IO, React and Node.js: implementing the server
Now still in index.js we can make the application listen for incoming connections:
server.listen(port, () => console.log(`Listening on port ${port}`));Let's also implement getApiAndEmit. It takes socket as an argument, which is nothing more than the communication channel between the client and the server:
const getApiAndEmit = socket => {
  const response = new Date();
  // Emitting a new message. Will be consumed by the client
  socket.emit("FromAPI", response);
};
The function takes the socket as an argument, and emits the message "FromAPI" which will contain the timestamp.
The message can be intercepted by a Socket.IO client on the frontend.
Server wise we are done, and the complete code for app.js should look like this:
const express = require("express");
const http = require("http");
const socketIo = require("socket.io");

const port = process.env.PORT || 4001;
const index = require("./routes/index");

const app = express();
app.use(index);

const server = http.createServer(app);

const io = socketIo(server);

let interval;

io.on("connection", (socket) => {
  console.log("New client connected");
  if (interval) {
    clearInterval(interval);
  }
  interval = setInterval(() => getApiAndEmit(socket), 1000);
  socket.on("disconnect", () => {
    console.log("Client disconnected");
    clearInterval(interval);
  });
});

const getApiAndEmit = socket => {
  const response = new Date();
  // Emitting a new message. Will be consumed by the client
  socket.emit("FromAPI", response);
};

server.listen(port, () => console.log(`Listening on port ${port}`));
We can test our server by starting the application with:
node app.jsAs soon as the server starts you'll see the following output: "Listening on port 4001" which confirms that everything is working fine!
Now let's implement the frontend.
Socket.IO, React and Node.js: implementing the React client
With our tiny real-time server in place it's time to make sense of our data.
If it's your first time with React don't waste time with build tools and use create-react-app (note that you should create the project outside the folder where the server lives):
npx create-react-app socket-io-clientThen move inside the project and install the Socket.IO client:
npm i socket.io-clientTo keep things simple we will use App.js in the src directory. Open up App.js, remove all the content inside the file and replace the code with the following:
import React, { useState, useEffect } from "react";
import socketIOClient from "socket.io-client";
const ENDPOINT = "http://127.0.0.1:4001";
function App() {
const [response, setResponse] = useState("");
useEffect(() => {
const socket = socketIOClient(ENDPOINT);
socket.on("FromAPI", data => {
setResponse(data);
});
}, []);
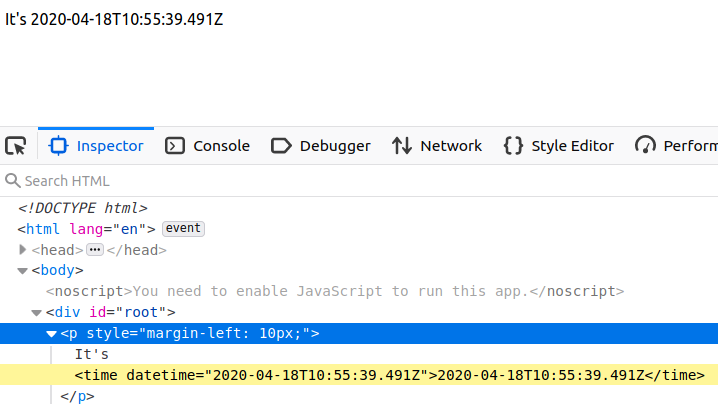
return (
<p>
It's <time dateTime={response}>{response}</time>
</p>
);
}
export default App;In this example we're using React Hooks, namely useEffect and useState. If you don't know what a hook is, check out my React Hooks tutorial.
The basic theory here is that we connect to the socket server on component mount with useEffect. Then, we save each new incoming message in the component's state.
There's just one more detail we need to fix in this logic, but for now save and close the file, open a terminal, go into the server folder and start the Socket.io server:
cd socket-io-server && node app.jsIn another terminal go into the client folder and start the React project:
cd socket-io-client && npm startIn the page you should see the timestamp updating every second.
Remember, the socket is a communication channel, and we're able to listen for any event happening inside it.
The client can listen for the event with the on() method. Once the connection is open, the frontend can receive updates without refreshing the page.
Closing the socket.io connection in useEffect
Often overlooked, the logic for cleaning up timers and listeners in JavaScript is indeed paramount to avoid memory leaks in the frontend.
Consider the following examples, where we move the Socket.Io client to a stand-alone component:
import React, { useEffect, useState } from "react";
import socketIOClient from "socket.io-client";
const ENDPOINT = "http://127.0.0.1:4001";

export default function ClientComponent() {
  const [response, setResponse] = useState("");

  useEffect(() => {
    const socket = socketIOClient(ENDPOINT);
    socket.on("FromAPI", data => {
      setResponse(data);
    });

  }, []);

  return (
    <p>
      It's <time dateTime={response}>{response}</time>
    </p>
  );
}
Then in the top-level component we include the client, plus some logic for removing it from the DOM:
import React, { useState } from "react";
import ClientComponent from "./ClientComponent";

function App() {
  const [loadClient, setLoadClient] = useState(true);
  return (
    <>
      {/* LOAD OR UNLOAD THE CLIENT */}
      <button onClick={() => setLoadClient(prevState => !prevState)}>
        STOP CLIENT
      </button>
      {/* SOCKET IO CLIENT*/}
      {loadClient ? <ClientComponent /> : null}
    </>
  );
}

export default App;
What happens here is that we toggle the appearance of ClientComponent by clicking on a button.
What could go wrong? The devil is in the detail: when ClientComponent unmounts from the DOM, the Socket.Io connection remains active.
Let's take a look again at our hook:
  useEffect(() => {
    const socket = socketIOClient(ENDPOINT);
    socket.on("FromAPI", data => {
      setResponse(data);
    });

  }, []);
The useEffect Hook here has an array of empty dependencies which assures that the hook runs only once.
This is fine, but we need also to close the connection when the component disappears from the DOM.
To do so, we return a function from useEffect, with a call to disconnect() on the client:
  useEffect(() => {
    const socket = socketIOClient(ENDPOINT);
    socket.on("FromAPI", data => {
      setResponse(data);
    });

    // CLEAN UP THE EFFECT
    return () => socket.disconnect();
    //
  }, []);
This way we effectively close the connection when the component unmounts.
Further resources
After this tutorial I suggest exploring Socket.IO's documentation to learn more about Rooms, Namespaces and other API methods.
Thanks for reading and stay tuned on this blog!
